|
Here
we're going to see how to model with metaballs, it's a quick
and quite easy way to create organic shapes.
Let's
start, push space/add/metaball in your front view
(key 1).
A ball appears (switch to shaded mode to get a better view
: Z key).
In the
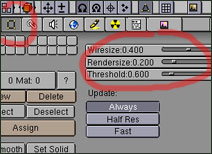
edit mode (F9), you can change the mesh subdivision
(Wiresize), it's quite handy because the less polygones
you have the better way you can manipulate your object.
We can give a small amount of polys (Wiresize) on the screen
and a higher subdivision for the rendering (Rendersize).
Threshold allows to get higher balls (ou or smaller ones).
Metaballs
allow you to "melt" balls with each other in order
to create organic shapes.
To undersatnd how they work select your first ball and make
a copy of it (shift d) or create a second one (add,space,metaball),
you then notice when moving it that the two balls join and
create a new shape.
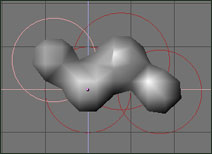
The goal here is to play with the balls in order to create
the desired shape, the tools you have to use the most are
the "move tool" (g) and the "resize
tool" (s).
It's
a fun and nice way to model but it's quite slow and hard
for big shapes.
Here is my first attempt at modelling a character with metaballs,
you can download it in the download section.
|