|
Here
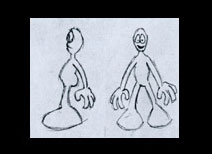
i take as an example a simple character to show you the
subsurf modelling technique.
It's a great modelling technique for organic modelling
(such as heads, humans etc...). Here the "rule"
is to start from a simple box that you extrude and sculpt,
subsurf allows the smoothing of this "cage".
First
you should use a sketch, it's really helpful to keep good
proportions.
In order to place a sketch in the background, press this
buttons on the left corner of your window (switch to one
another),
 and load your picture,
then come back to your 3D view. and load your picture,
then come back to your 3D view.
Then
you can start, let's add a box : space/add mesh/cube.
Place the box in front of one of your character's feet.
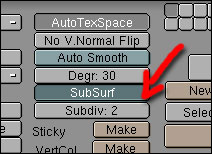
Press subsurf in edit mode (F9).
Subdiv represents the amount of smoothing.
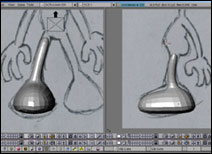
You
can start your sculpting ! Select 4 points(a face) and extrude
(E). Here the point is to extrude and move(G),
resize (S), rotate (R) the points and faces.
Try to get the smallest amount of points, it helps you get
more control on your mesh.
If you do a mistake you can "undo" with U (only
in edit mode).
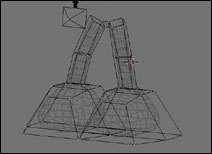
Once your first leg finished, you have to mirror it then
you don't have to model the other one.
Quit the edit mode with tab and press shift D
(copy), then press S and X (or Y)(mirror).
Now you have to join the 2 legs, press ctrl J (with
the 2 legs selected).
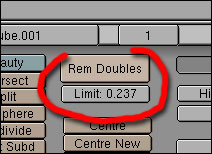
In order
to make the 2 legs part of the same mesh you have to connect
them, bring the points you want to connect as close as possible
to each other, select all the points you want to join and
press Remove doubles (give it a higher limit first).You
can also do W/remove doubles.
 You can check
how many points are selected on the top right corner of
your screen (here 2 points out of 58), it's quite useful
to see if Blender joined 2 points together (before 2, after
1). You can check
how many points are selected on the top right corner of
your screen (here 2 points out of 58), it's quite useful
to see if Blender joined 2 points together (before 2, after
1).
Then
keep on extruding your faces following your sketch.
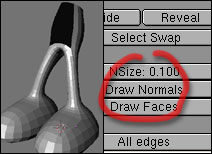
It happens sometimes when you extrude your faces (or copy,
or mirror) that your mesh looks black, that's because your
"normals" are upside down, press draw normals
to see which ones are upside down.
To put them back in order, select the wrong faces and
press W/flip normals.( you can also press double
sided if it doesn't work).
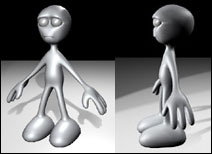
That's
it, now you can model in subsurf, finally the point
here is to extrude and play with polygonnes.
For the arms, i extruded the shoulders and the i subdived(W/subdivide)
in order to have a few faces to extrude the fingers.
Tutorial
: metaballs
|